Showing posts with label Creative Paperclay. Show all posts

Wednesday, 7 June 2017

Creative Paperclay® June tip for saving money....

Hi everyone, and welcome.

 Today I am sharing my June tip/technique. I have a quick tip to help save you some money (we can all use that right?) and have some creative fun at the same time.

This is an idea I came up with while looking to get myself some smaller tools to sculpt with. To start I did what most of us do right - I went to google, lol... I found many people making their own tools, but out of aluminium and brass tubing.  This didn't seem economical enough for me, so I decided to create my own from a few household items and paperclay...

Supplies:
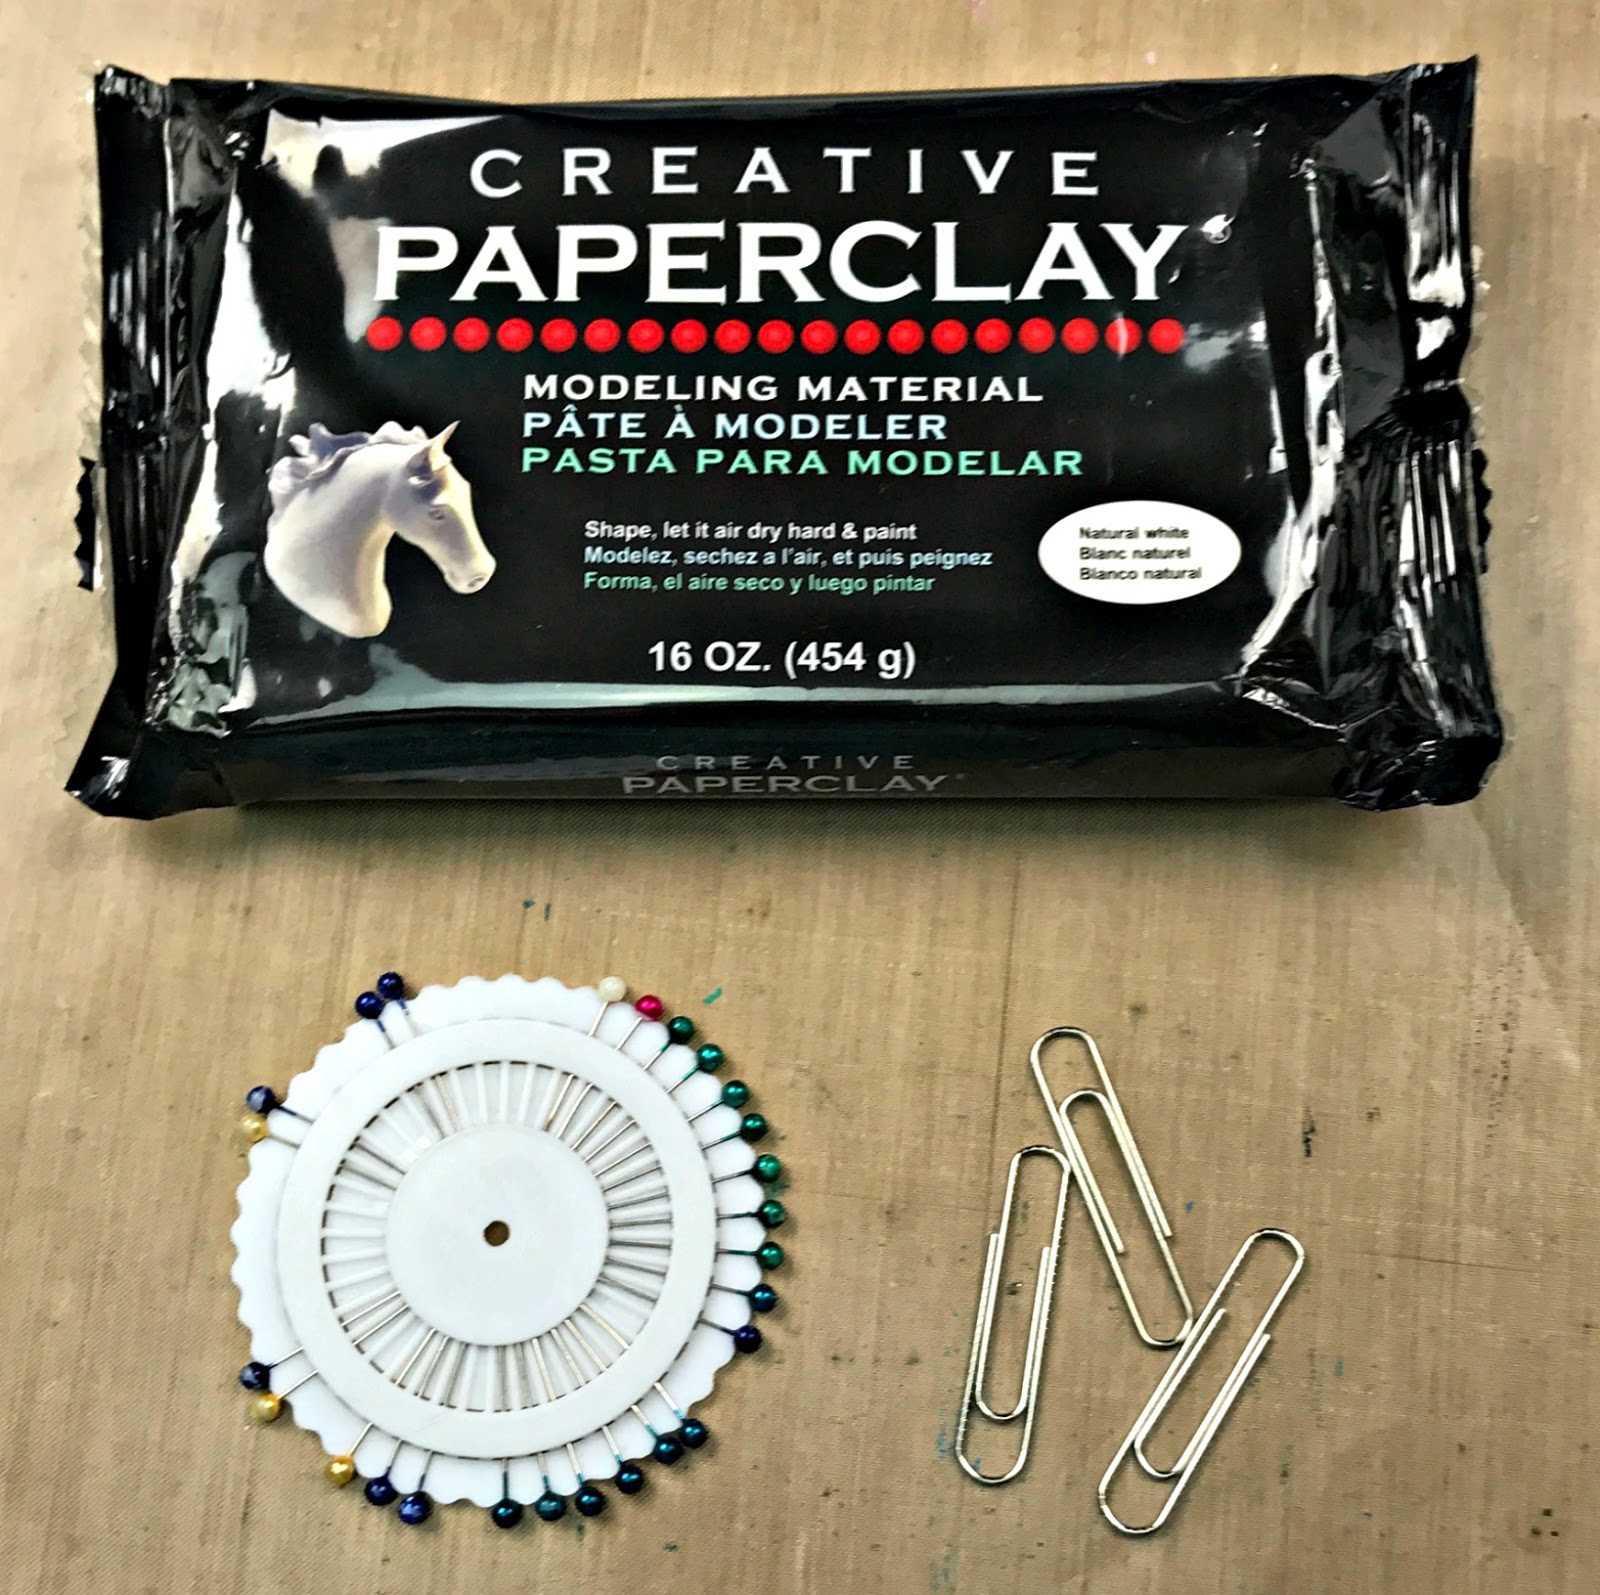
Large paperclips
Small paperclip
Sewing Pins


Directions:

I began with my Creative Paperclay® and some basic household items.... some sewing pins and oversized paperclips...

 I removed the heads from the pins and then bent the ends slightly.... this is to ensure that they don't pull out of the formed clay handle once dry....

I applied clay both underneath the row of pins and then on top of the pins

 I kept adding clay and smoothing it out until I was happy with the size and shape, and set it aside to dry...

 Next I began with one of the large paperclips, opened it out, and left the curves of the paperclip in tack...

 I embedded the paperclip into a lump of clay...

smoothed the clay around the paperclip, and again set aside to dry...

 For my final tool, I used some jewellery pliers to make smaller loops from my paperclip...

 I again embedded the shaped paperclip into a lump of clay...

 and smoothed the clay around to form the handle....

Once again I set it aside to dry...

Once the clay was dry I grabbed out my Silks Acrylic Glazes and painted my new tools... Naturally I chose two of my favourite colours, Spiced Pumpkin and Rich Cobalt...


 So with a very small amount of of Creative Paperclay® and some basic household items I have four new tools to start creating with and I can't wait to get started.... look out for my next Creative Paperclay® blogpost where I will make use of my new tools.

thank you for stopping by and joining me here today

Till next time
Happy Creating

Cindy Porter


Wednesday, 17 May 2017

Tip for Creative Paperclay®

Hi everyone, and welcome.

It's my turn to share with you a tip or technique.... today I have chosen to share a quick tip....  this is something I came up with while trying to make sure I keep my paperclay in new condition after I have opened a new pack...

Being that I enjoy scrapbooking along with many other creative endeavours, I was searching around for the best way to store my opened Creative Paperclay® when I spied my Fuse tool.  For those unfamiliar with this tool, it was designed with the pocket page scrapper in mind, to seal off the small pockets on the multi pocket pages, a great little tool that I have found many fabulous uses for, and now I can add one more to that list - re-sealing my Creative Paperclay® packets.

So we begin with an open packet of paperclay.

next you need to push all the air out of the packet


Then you start to roll the Fuse tool (as close as possible to the clay) across the package.


Now I did learn that the Creative Paperclay® packaging requires more pressure and several runs across on both sides, but the Fuse tool did seal the package just like new, so my paperclay will stay as fresh as the day I first opened the pack.


I do hope this little tip is helpful and you can enjoy many good times with that new pack feeling right down to the last speck of your Creative Paperclay®.

You can get your Creative Paperclay® here.
and you can find the Fuse tool here.

Until next time, 
Happy Creating  


Thursday, 4 May 2017

Natures Pen


Hi Creative Paper Clay ® fans, it's Cindy here, welcome to my very first post as a member of this fabulous Design Team! I am so excited to share with you my "Nature's Pen" and show you how to create your own. I chose to create this pen from the Delight Air Dry Modeling Compound, to ensure that the pen remained very light and because once dry the Delight remains very soft and is spongy even after it has dried thus making it very comfortable to use.... there will be no callous' here when I'm writing my memoirs (lol)...


Supplies:


So for this project you'll need the following:
Clay shaping tools
Rolling pin
Water for smoothing clay
Acrylic paints (I used Vivid Ultra Metallics on mine)
Gel medium
Rhinestones
Paint brushes
Water for your brushes
Spay varnish


Directions:
So I began with some Delight and made some rough 'snakes' ready to form my wooded base of the pen..
Next up with my regular old Bic pen I removed the ink nib from the barrel and started wrapping the barrel with the "snake" strips...

continue wrapping the pen barrel until it is fully covered...

 it is time to add detail and make it look more like a log... I achieved this by using small ball tools and silicone tools

 
I added smaller details using a scalpel blade.. 

Time for making the leaves, roll out some more Delight.... cut out some tear drop shapes, and shape and then mark and curl them up....

 
I rolled out some more Delight and used a small cap to press out circles.... you need 6 circles to form one flower... I made three flowers in total...

I also rolled out some very thin snakes... to make into the tendrils.... 

Now it's time to paint.... hmmm
no rude comments about what it looks like at this stage.... lol...

Paint up all the pieces...

Time to assemble Nature's Pen...
I used Gel medium to adhere the painted flowers, tendrils and the rhinestones in the flower centres...

To finish off my pen, I gave it a spray over with varnish, and re-inserted the ink nib


some close ups of the finished pen

thank you for stopping by and joining me here today,


Till next time
Happy Creating
xC


Friday, 10 March 2017

Seahorse Fantasy..... with Creative Paperclay

Hi everyone, today I want to share with you all a piece I have created "Seahorse Fantasy" using the fabulous products from Creative Paperclay...  I love using these products to create 3D dimensional projects that I can sculpt and shape to my hearts desire...


Directions:
Step one: roughly sketch out a couple of basic seahorse shapes on some chipboard to use as a base and cut them out...

Step two: add some paperclay... I used Delight Air Dry Modeling Compound .
I love how easy it is to mould and shape as I desire...

Step three: time to give them some detail... use a metal knitting needle (or something similar like a skewer) to texturise and create patterning on the seahorses...

Step four: draw and cut out and then score the fins for each of the seahorses...

 Step five: paint up the seahorses and fins and then attach them together... I used the Vivid Ultra Metallics to paint them up, giving them loads of shine...

Step six:  create the background... paint up a canvas panel...

 Step seven:  more fun with Creative Paperclay...  draw and cut out some reeds, shape and mould them with the Creative Paperclay, in the same method as the seahorses.... once dry,  paint them to match the painted background canvas....

Step eight: use gel medium to put it all together... adding some coloured gauze and mini cabochon's to finish off the piece.


Supplies: 
Canvas Panel
Acrylic Paints (I used Vivid Ultra Metallics)
Gauze
Mini Cabochons
Chipboard sheet
 I hope you've found this tutorial inspirational...
till next time
Happy Creating
xC

Tuesday, 3 January 2017

Steampunk Mermaid and Enjoy the Journey

Hi everyone, I'm back today to share with you my latest projects for Scrap FX; Steampunk Mermaid and Enjoy the Journey...

First up a layout Enjoy the Journey...
The steampunk theme Enjoy the Journey title and steampunk Wire Heart Large where perfect for this layout...

 Love this new steampunk theme title; Enjoy the Journey ..... with the cogs.... I painted it up with the Vivid Ultra-Metallics True Silver and China Black...

 I used the new Mechanical Time Stencil to create background texture...

 I used the Wire Heart Large; to frame up the photo.... and painted it up in the same fashion as the title...

Finally to create more texture on the background I randomly stamped the new Clock Melange Stamp....

Next up I played with the new Wall Art Steampunk Mermaid... she is an oversized version of the Steampunk Mermaid...
She was loads of fun to paint up...

I used Vivid Ultra-Metallics to paint the mermaid in the vivid blues and greens...


I used more of the Vivid Ultra-Metallics True Metal paints mixed with some dry medium lang lang sand to create loads of rusty texture on these cogs....

for her hair I created texture with paperclay before again painting it up with the gorgeous Vivid Ultra-Metallics paints...

Scrap FX products used:
Enjoy the Journey 
Mechanical Time Stencil
Wire Heart Large
Clock Melange Stamp
Steampunk Mermaid

till next time
happy creating
xC