Wednesday 19 July 2017

Creative Paperclay® July tip ....

Hi everyone, and welcome.

It's my turn to share with you a tip or technique.... today I have chosen to share a quick tip....

There are several reasons I came to love Creative Paperclay®. 

 Firstly I love that Creative Paperclay® is nontoxic not only for my own personal safety but that's fabulous for the environment also. 

Secondly, I love to work with an air dry clay as opposed to having to use a kiln. The truly awesome  thing about Creative Paperclay® is that even when a piece is dry and it is as hard as a piece of wood, it can still be changed....  Did you know that you can then carve into it or sand it, a really awesome advantage, meaning your piece can be altered even once it was finished...  this is such a reason to love Creative Paperclay® especially for me as I tend to want to keep changing my mind, lol...

Thirdly, I love working with air dry clay, as you can you work with it for hours at a time, if it does start to dry out, you can just mix a little water into it and it's as good as new.... 
great for me as I work very slowly... 

thank you for stopping by and joining me here today


Till next time
Happy Creating


xC

Tuesday 18 July 2017

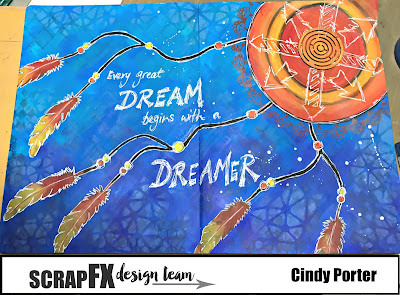
Dreamer Art Journal Spread Tutorial for Scrap FX

Hi everyone, thanks for joining me today for a special share for Scrap FX...
A step by step photo tutorial of my "Dreamer Art Journal Spread"

Scrap FX have so many wonderful products that are fabulous not only for scrapbooking and mixed media but also for art journalling as well...

Here's how I created my journal spread:
I began by painting my background... using Dylusions paints...

next up I started with my circles for the dream catcher...

the Scrap FX Circle Stencil is fabulous for creating concentric circles....

adding more layers...

I stamped the smaller feather from the Feather Stamp Pack using Dylusions paint... initially in one colour.... then....

re-stamped the feathers using two colours of Dylusions paint... 

I applied several more coats of paint to my dream catcher...

and then painted in my string lines and began stamping my background...  I began using the Harlequin Stamp...

then added more detail with the Chicken Wire Stamp and the the new Polygonic Stencil...

and added even more to my background using the Moroccan Tile Stamp...

Next I stamped my dream catcher using two of the arrows from the Arrows Stamp...

I stamped around the edge of my dream catcher using the Lace A Loops Stamp, by inking and stamping only one or two little lace loops at a time to curve around the dream catcher...

Next it's time to paint in the beads on the dream catchers strings... and add a centre piece to the dream catcher using one of the Maze Circles painted up with a couple of Dylusions colours...

I added my quote with a white pen and then started adding white pen highlights...

a final look at the completed piece...

Scrap FX products used:

I hope you enjoyed this project...
till next time...
Happy Creating...

xC

Wednesday 5 July 2017

3D Chrissy Tree for Creative Paperclay®

Hi Creative Paperclay® fans, it's Cindy here, I am excited to share with you my latest project a "3D Chrissy Tree" just in time to decorate your table for Christmas in July.... keep reading to see how to create your own.


For the how to... I created a little video...

One last look at the completed piece...


thank you for stopping by and joining me here today


Till next time

Happy Creating

xC

Tuesday 4 July 2017

Tiger Kingdom for Scrap FX

Hi everyone, thanks for joining me here today, I have my latest share for Scrap FX...
 Today is a layout of another photo from one of my many visits to Tiger Kingdom... I did come home with four full CD's of pics to scrap from Tiger Kingdom and those were just the photographers photo's, it doesn't include all the ones that Belinda and I took ourselves... I totally loved spending time with these amazing animals...

 I used the Tiger Silhouette on the layout... this is laser cut black cardstock and the detail is amazing...

 I used the Tiger Kingdom title, naturally...lol... and I painted it up with some Twinkling H2O's...

 I added the #pawesome from the #pets set.... again painted up with Twinkling H2O's.....

 I added a 2015 from the 2015 Year Pack...

I used the new Polygonic Stencil to texturise the background...


I finished the layout with the Rectangle Collage, which I cut in two...

Scrap FX products used:


till next time

Happy Creating

xC