Tuesday, 26 April 2016

#love you loads

Hi everyone, today I'd like to share with you my latest creation for  Couture Creations....
"#love you loads"

 I love this pic of my niece Chelsea.... she is such an intense little character...

Now onto how I but this layout together...
I began by painting some gesso onto my background paper...

next I added some colour with gelatos...

I then went back and added more gesso...
and then more gelatos...

next I created a stencil from a magazine cover using the Damask Frame die...

I then applied some modelling paste through my created stencil....

 I cut some strips and coloured them with some gelatos...


I coloured up some flowers using some Lindys Stamp Gang sprays...

I then put it all together... 
The finishing touch was adding the title....


Products used:

Magnolia Lane Collection:

Tools and Accessories used:

Adhesives used: 

till next time
happy creating


Monday, 18 April 2016

Seahorses and Rugged Coastline

Hi everyone, thanks for joining me...
Today I am sharing my latest work for Scrap FX... 
"Seahorses"

 I couldn't resist creating a canvas for the fabulous sea themed releases this month...

I love the new Seahorse stamp.... here I embossed the stamped image and then coloured it using the distress crayons....

I created the background using the new Seaweed stencil.... it is totally awesome, I can already see myself using it all the time... I love it!

 The new Sea Scene large, was so much fun to work with... I painted it up with Twinkling H2O's and mica powders.... and added some small shells and art stones for loads of texture...

 I also added gauze and some extra shell pieces and art stones...

Scrap FX products used: 


Next up I have a layout to share
"Rugged Coastline"...

this is a picture of some of the amazing coastal area I visited in Thailand... simply stunning to explore... 

 Again I had a ball playing with the Seaweed stencil to create my background using impasto and colouring it up with a variety of Twinkling H2Os, they give off such shine...

for the title 'Rugged Coastline' I added some impasto to create texture and then coloured it up with some more Twinkling H2Os...

I used the World Map transparency cut into pieces to mat my photo... and added some art stones to finish it off...

another close up of the background texture created with the Seaweed stencil...

 One last pic of the completed layout... 

Scrap FX products used:


I hope you enjoyed these projects...
till next time 

Happy Creating
xC


Monday, 11 April 2016

Worlds Away

Hi everyone, today I'd like to share with you my latest creation using the new Magnolia Lane collection from Couture Creations.... "Worlds Away

 I love this pic of Ta Prohm in Cambodia.... I just love everything about this temple that has been engulfed by the trees and jungle... 

Now a step by step on how I but this layout together...

I began by stitching some pieces of the white lace to my background...

next I added some coloured modelling paste through a leaf stencil...

I then added some watercolour around the stencilling.... next I outlined my leaves with a white pen...


I coloured up some gauze with some Twinkling H2O water colours...

I die cut the Damask Frame die...

I used a piece of the die release paper and covered it with some gel medium and more Twinkling H2o's... it gives a tinted shiny finish to the release paper...

I layered the die cut and the coloured release paper behind the photo...


I painted up some flowers with more of the Twinkling H2O's (I love how they shimmer) ... I even tinted the diamonte centres with the shimmering watercolours...


I then began putting it all together... 

I added some art stones...

 I used more Twinkling H2O's to colour the art stones... and then added the flowers...


 The finishing touch was adding the title....


Products used:

Magnolia Lane Collection:
Tools and Accessories used:

Adhesives used: 

till next time
happy creating


Sunday, 3 April 2016

Fun Moments

Hi everyone, thanks for joining me...
Today I am sharing my latest work for Scrap FX... 
"Fun Moments"
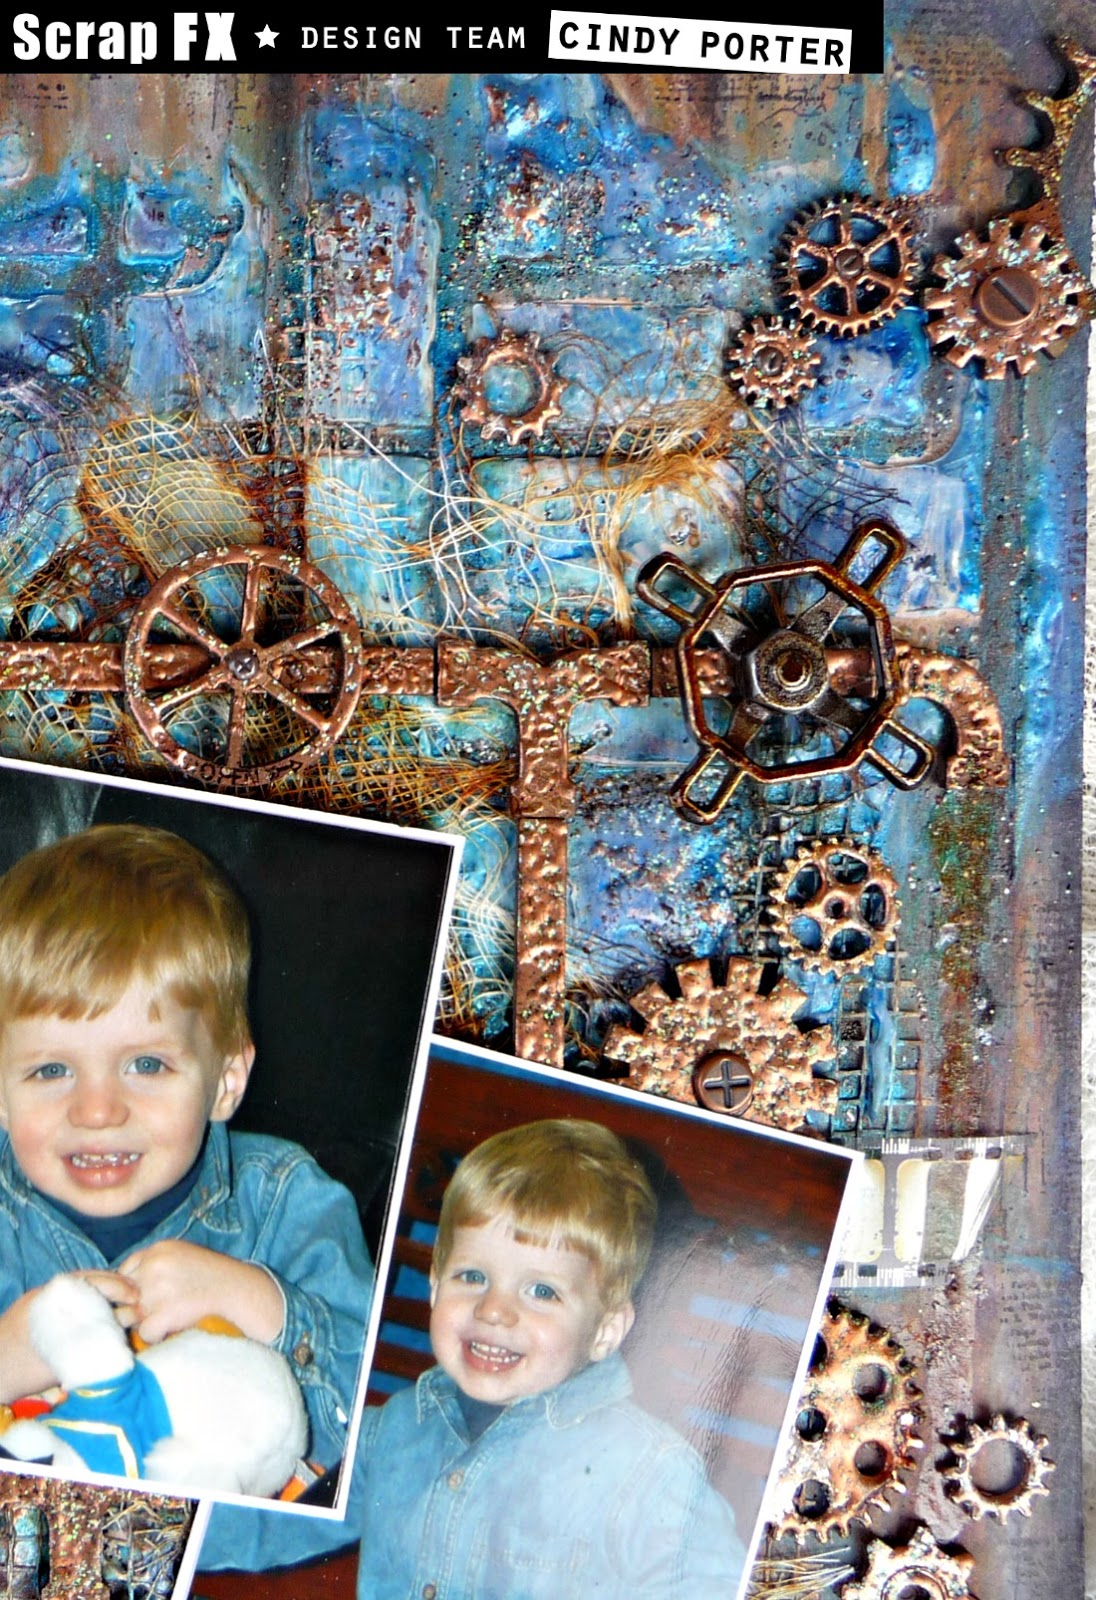
these are a series of photo's I took of my nephew a few years ago now, I finally have got around to scrapping them.... he was such a cute kid.... now he is almost a teenager...

to create my background, I used the pipeworks stencil and modelling pasted added some colour, gauze, mesh tape and finally I sprinkled some embossing powder randomly over the stencilling ....

I used the leaky pipes chipboard set to embellish the layout.... I coated all the pieces with Stampendous aged embossing powder...
I also used the cogs pack and mini cogs pack, and embossed them in the same way...

I wanted to create a look of dripping and leaky pipes, so I added some Distress Ink re-inker to the page, the resin content gives the wet look to the layout, perfect to resemble rusty water drip marks...

 More of the cogs, coated in the aged embossing powders...


another close ups to show the background and pipe detail...

One last pic of the layout....

Scrap FX products used:


till next time
happy creating


Thursday, 31 March 2016

some fun with ColourArte

 Hi everyone, thanks for joining me.... today I like to share a couple of projects I created using some fabulous ColourArte products... 

First up I have a layout to share: Phuket

Products used:

Here's the process:
  cover white cardstock with clear gesso and then apply modelling paste through a stencil and dry

 select your colours of twinkling H2O's and activate them with water then apply in the general area of your stencilling.

 paint your title with the activated H2O's

 add some random stamping around your H2O colours

diecut some feathers from white cardstock and paint up with the same twinkling H2O's.

 add some random line sketching with a fine marker, for added interest and to help make the the vivid colours pop right off your page.

/'
next start to build up your photo layers, I used some white corrugated card, mini doily, green dotted paper, gauze and some bubble diecuts, along with our coloured feathers... 


 add some random mini beads for a finishing touch...


Next up I have a canvas to share...


Products used: 

Now onto the process:
 I began by applying paper scraps onto the canvas using gel medium.

next I started painting on my Silks acrylic glazes in the warm colours...

and then I added the cool colours.... 

 next I randomly stencilled on some gesso...
I almost stopped the project here as I really liked the abstract feel of the canvas... 

  but I decided to keep going.... I designed out my image using gesso...  don't be put off if you feel that you can't draw as you can use graphite paper to transfer a photo copied image... and then paint it out...


 finally I added in some black and white detail to finish him off... 


thanks for stopping by,
happy creating,
xC