Wednesday, 31 July 2013

Cupic Love Tag Tutorial

Hi today I thought I would share a little step by step tutorial of a little tag I created with you all...

Begin with the Scrap FX BookPlate and give it a coat of white Gesso

Once dry use the Scrap FX leafy swirls stencil and spread a thin layer of Helmar Acid Free Glue over the selected portion of the stencil and then carefully remove the stencil. Make sure you immediately wash your stencil to remove the Helmar Acid Free Glue before it dries...


Heat the Helmar Acid Free Glue stenciled pattern with a heat gun. Heating the glue will cause it to bubble up and set, creating great texture but keeping your nice stencil pattern. 

Spray your tag with a couple of different colour sprays, and dry with a heat gun.


Using your finger apply gilding wax over your stenciled Helmar Acid Free Glue, to highlight it further. 


Apply gilding wax to a Scrap FX‘love’ title (from the Love words fancy set) 

Finally, using Helmar glues, adhere the embellishments onto the tag base. Use the Helmar 450 Quick Dry Adhesive to adhere the resin cherub and the fabric flower and doily. Use the Helmar Acid Free Glue to adhere the Scrap FX ‘love’ title.

Insert a couple of heart pins behind the flower...a little tip; apply a tiny bit of Helmar 450 Quick Dry Adhesive onto the point of the pins before inserting them to ensure they stay in place.
Finally attach a few dangly pearls/bling, and a bit of ribbon in the top to finish off your tag.  


till next time, 
happy creating
xC

Monday, 15 July 2013

A quick Pin Cushion with Helmar

Hi everyone, today I want to share with you a pin cushion chair that I created using Helmar 450 Quick Dry Adhesive.  I found a little metal chair at the reject shop and just knew I had to create something with it....  I was originally just going alter the chair until a good friend of mine mentioned she had made one into a pin cushion, so a very big thanks to Robyn for the inspiration.


Isn't this chair just too cute....


so first up I made the cushion using some silk fabric a cardboard base and some wading...and decorated the edge with some lace which I sprayed teal...


from there it was quick and easy to complete, glue on some flowers, a metal clock embellishment and some metal leaves with Helmar 450 Quick Dry Adhesive .... I attached a tassel to underneath the chair using Helmar 450 Quick Dry Adhesive.... it's amazing how strong this adhesive is!


I also used Helmar 450 Quick Dry Adhesive to make the fancy pins.... so easy just to place a little glue on each side of the bead and slide it onto the pin and your done....


  here's a couple more pics....


All created using Helmar 450 Quick Dry Adhesive

Till next time
xC


Friday, 12 July 2013

A Recipe for a Scrappin’ Good Time – A New Challenge!


Are we ready for a challenge???

Our team at Scrap FX has collaborated to come up with something dazzling for you to check out and play along with! Each Designer contributed 1 ingredient that has to appear on the project ....

This is what the recipe includes:
The color teal
Feather(s) (real or faux)
Use a stencil
Include some heat embossing
Flowers

Makes for a fun creation? To see the team’s inspiration and to help get you started check out the blog: 

Now its your turn to show us what you can do with our recipe for a chance to be featured on the ScrapFX blog!!   All you have to do is create any type of project and include all items from the recipe list and post your creation to the Facebook page by Sunday July 28. Don’t have Facebook? No worries, post a link to your creation on the blog here and we’ll be happy to stop on by to check it out! 

So here are some pics of my project created from the recipe, hope it inspires you to have a go..... 


Till next time
Happy Creating
xC

Thursday, 4 July 2013

Precious Innocence

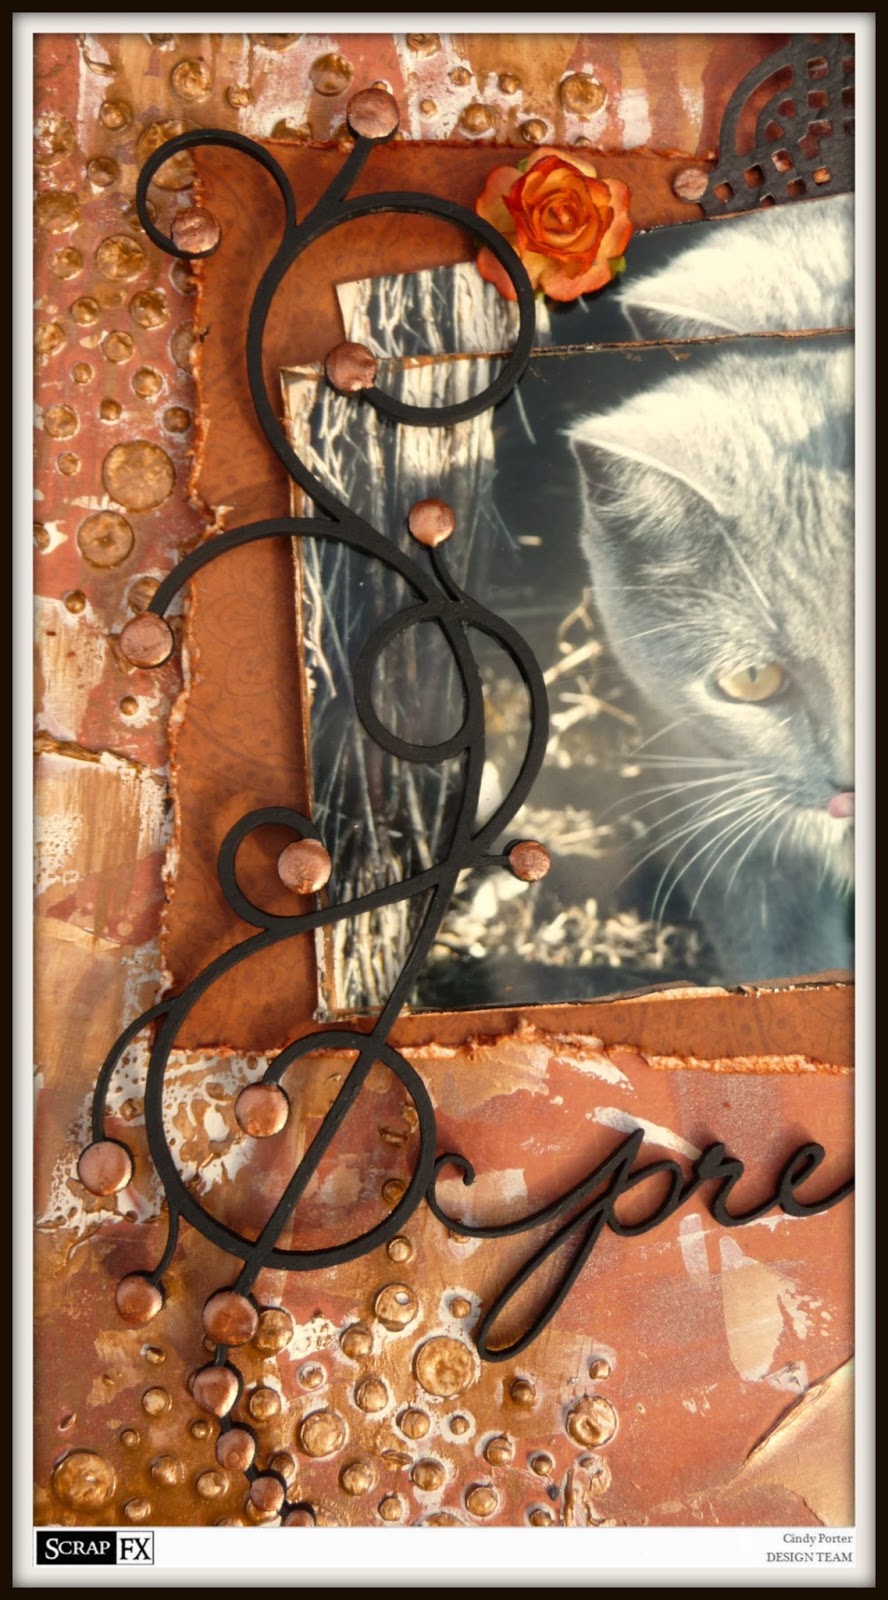
Hi everyone this month Scrap FX released a whole lot of new stencils and wow, I'm in love!!  I had so much trouble deciding which ones to use first.... here are couple of layouts I created....

First up is "Precious" a layout featuring my adorable fur baby "Cleopatra"....using the Random Circles Stencil...


On this layout I also used one of the new flourishes and one of the new "midi" titles that I just adore!! Don't you just love the texture from that Random Circles Stencil!!


Products used: 
Scrap FX: Precious midi


Next up is "Precious Innocence" a layout featuring my late mum and I (along time ago lol) ....using the the new Peacock Feather Stencil....


For this layout I also used another of the new flourishes and more of those fantastic midi titles...


check out the detail you can get from the gorgeous Peacock Feather Stencil...just love it...


Products Used:
Scrap FX: Precious midi
Scrap FX: Innocence midi

till next time
Happy Creating
xC

Wednesday, 3 July 2013

blog lovin'

<a href="http://www.bloglovin.com/blog/6627343/?claim=zm3f8tuhjxr">Follow my blog with Bloglovin</a>

Just trying to sort out blog lovin....  and I think I've done it...

Thursday, 27 June 2013

Journal Book Cover

Hi everyone I'd like to share with you a step by step on how I created my journal book cover.
Book9
Start with a hardcover book and remove all of the pages.
  PicMonkey Collage
Using Helmar Tacky Craft Glue  put a nice thick layer  of the glue over the the outsie of the book cover.   For best results make sure that you have a nice white thick layer.
Book3
Using an open flame (I like to use a candle) carefully and slowly burn the glue by passing it slowly over the open flame.  This process is time consuming and should not be rushed, keep passing the glued cover over the flame until the entire cover is burnt, as seen below.   Note that as you burn the glue it will bubble up and stretch, this creates the amazing texture.
Book5
Once the cover is burnt gently(as the glue underneath is often still not set) wipe with a soft cloth to remove the soot.
After leaving the cover for a couple of hours ( I left mine overnight) to allow the Helmar Tacky Craft Glue to dry completely, rub the cover over with Inka Gold.
Book6
Don't forget to shine up the cover with a soft cloth.
Book7Here is a close up of the amazing texture that is achieved from the Helmar Tacky Craft Glue.
Book8
Finish off the Journal, lining the inside of the cover with printed paper using Helmar Acid Free Glue. Use eyelets and seem binding to hold in your pages.
Book10
I hope you've enjoyed seeing this project as much I as enjoyed making it
Till next time
xC
Helmar

Sunday, 23 June 2013

Paw Prints on my Heart

Another quick share with a layout of my gorgeous furbaby, Tiger Lily. 
I created this layout using plenty of Scrap FX and Helmar for a sketch over at Skissedilla.  


Products used:

Till next time
Happy Creating
xC

EDIT:  This post has been highlighted on the Party Time Tuesday Blog where a wonderful Design Team posts daily to inspire you. On Tuesdays they have weekly challenges offering prizes for participants. Go check Party Time Tuesdays Your Daily Dose out! Your going to love it!

Friday, 21 June 2013

Unforgettable

Thought I'd share a layout I created recently. 
Just a quick layout of one of my fav photo's of my hubby and I....


Now don't forget we currently have a great challenge on the Scrap FX blog, it's your chance to get featured on the blog, how cool is that, here's the details again...

We want to see your card creations featuring ScrapFX products! So starting now until July 15th upload them to our Facebook page and show us what you got. Don’t have Facebook? Its okay, leave us a link here in the comments section and we’ll come visit you. Please be sure to leave a direct link. The Design Team will get together to decide on who really rocked the hizz-ouse based on creativity and of course how you made ScrapFX shine!! This cardmaker will be the winner of the prize pack shown on the Facebook page and you will be featured right here on the blog!! So what are you waiting for? The cardmaking frenzy starts now! Looking forward to seeing your creations!!

Till next time
happy creating
xC

Tuesday, 4 June 2013

More Scrap FX

Hi  today I have a  couple of layouts I have done for Scrap FX to share with you all.
First up "Magnificent" a layout sharing my time at the Trevi Fountain in Rome.  
For this layout I made the most of the Nappy Pin Journal Spots and the new Wood Grain Stencil to transform them into an extra embellishment.
P1190736f
A way to change these pieces from a baby's page to use on any layout.
P1190736b
Here you can see the mini Sun used just as a filler for a bit of movement.
P1190736h
the products I used to create this layout:

Next up another layout "Moments"
P1190739c
For this layout I used the Honeycomb Patchwork stencil to paint the background pattern.  As this is a chipboard stencil it is easy to use to create a painted image .  I also had fun using the Mini Wings with a clock face on this layout.  The new mini shapes are so versatile and I think I'm in lurve. On this layout I used the Helmar Liquid Scrap Dots to make the title stand up on the page.
Products used in creating this layout:
Thanks for stopping by, I hope you're feeling inspired.  I hope to see you sharing your creations of the Scrap FX facebook page soon.
till next time, happy creating
xC

Friday, 31 May 2013

Art Doll

What do you get when you combine all of the following..??
Mixed pic

Well an art doll of course!! 
I began with a regular doll, picked up second hand.  I always use baby wipes to clean up my work space after spraying with glimmermists and I like to recycle these, for just such a project. 
I used the pre-coloured baby wipes to wrap the doll and adhered it with Helmar 450 Quick Dry adhesive.
Mermaid
Mermaid1
Using the Helmar 450 Quick Dry adhesive you can manipulate the shape of the wet ones to create a nice shape for your doll.  
Next using Helmar Gemstone Glue I created wavey lines and coated them with glitter to decorate the doll.  I used Helmar 450 Quick Dry adhesive to attach flowers to the front of the doll and then painted the doll with Viva Precious Metal Colour.
Mermaid5

Finally, I used Helmar 450 Quick Dry adhesive to attach some lace around the head. and Helmar Professional Acid Free Glue to secure the strips of wet ones to create the skirt at the bottom.
Mermaid4
I hope you enjoyed this project and I hope to see you sharing your creations on the Helmar Facebook Page.
Just before I go, I'd like to thank my good friend Linda Baldock for the inspiration in creating this project, she creates many amazing art dolls, and is another fan of Helmar adhesives too!
Till next time
Happy Creating
xC
Helmar
Helmar Design Team 2013


EDIT:  This post has been highlighted on the Party Time Tuesday Blog where a wonderful Design Team posts daily to inspire you. On Tuesdays they have weekly challenges offering prizes for participants. Go check Party Time Tuesdays Your Daily Dose out! Your going to love it!