Tuesday, 24 November 2015

Tiger Kingdom

Hi everyone, I'm back today to share with you my second Couture Creations blog post for the month.... I'm excited to share this layout I created using the Vintage Rose paper collection.


this is a pic of "Lepar" a cheeky tiger cub I had the pleasure of playing with and cuddling on my recent holiday in Phuket... 

now onto how I created it...
 I started with some papers from the Vintage Rose Collection... and the Rowena die....
I diecut 6 shapes from each of the three papers I had selected but only used 11 of them in the end... I now have some spares for a future project... 

 I ripped my background page...  and then inked everything up...

I used a piece of kraft cardstock to create my background... and using a stencil I had previously created from the honeypot die and a magazine cover, I added some light molding paste with a palette knife...
 I dried the paste with the heat tool...

I sprayed some colour onto my molding paste....
 then inked up the edges...

Next it was time to start putting the layout together... I glued some of the Rowena diecuts to the underside of my ripped green background paper and then attached that to the sprayed cardstock...

I used the Glitzen Glamour through another of my stencils (this one was created from the Conservatory die and a magazine cover)... 

 I added some stamping to the background before putting it all together...

a couple more diecuts under the photo, mounted up with some foam tape... some gauze and a title and to finish the layout off, some very, very tiny micro beads, for a little extra texture....


Dies used:

Tools and Accessories used:
Adhesives used: 

till next time
happy creating

Monday, 16 November 2015

Guest Spot for Crafty Crusaders - Hidden Treasures

Hi everyone, here is a step by step I did a while back for Crafty Crusaders and forgot to share with you all... "Hidden Treasures"

I created a canvas showcasing the Pebeo Studio Acrylics colour paints, Pebeo Linen Canvas board and the Catalyst wedges...

I began with the Pebeo Linen 8x10" canvas panel...

I added some pieces of torn book pages using some gel medium... marked out the position for my photo ready to apply modelling paste...

I applied modelling paste avoiding the area marked for the image and leaving some of the book pages showing...

I created grooved texture using the Catalyst Contour C-23....

I created further texture in the modelling paste using the Catalyst Wedge W-04...

Next I began to add colour using the Pebeo Studio Acrylics; Mars Black, Titanium White, Payne's Grey, Burnt Umber, Burnt Sienna, Raw Sienna, Yellow Ochre, Naples Yellow hue, and Hookers Green...

once I had a rough base I added the photo, and set about using more modelling paste and the Catalyst wedge and contour to try and blend the photo into the canvas seamlessly....

I then started again with the Pebeo Studio Acrylics to perfectly work in the colour tones... unfortunately I got so carried away, I forgot to take any further progress photos... I was so lost in the creative moment, that it completely slipped my mind... 
but here's how the canvas ended up!!

I added a chipboard title to complete the canvas...

I am really happy with this piece and am now hunting for the perfect frame for it...

thanks for joining me today,

till next time,
Happy Creating,
xC

Thursday, 12 November 2015

Journal Page

Hi everyone, thanks for joining me here today...

Today I am sharing my latest work for Scrap FX ...
first up I have a journal page that I created using some of the latest releases..."Luv u 4 Eva"
 I came across this photo of Bill and I that we had taken some years back at one of those old time photo places...  I thought it would make a nice journal page with the new heart themed releases...

 to create my background I used some modelling paste with the newly released Key Heart Stencil...
coloured it up with sprays and Inka Gold...

I used the  Luv u 4 eva heart from the Graffiti Hearts pack, you get three different hearts in the pack...

I used the Hearts Entwined chippie at the bottom of the page... I love this new chippie... I coloured it up with Inka Gold and used some clear crackle over the hearts...


a close up of the showing the black Croco also used on the page...
One last pic of the page,

Scrap FX products used:
Graffiti Hearts
Key Heart Stencil
Hearts Entwined


Next up I have another quick share.... I decorated a Pizza Box to send to a friend...

 I used the new Hearts Divine Stencil with some modelling paste...

I also used the Petal Pattern Stencil again with modelling paste...

I used the Chicken Wire Stamp... 

I coloured the whole thing up with some Lindy's sprays and some Inka Gold for highlights...

I gave it a coat of gloss sealer to make sure the colour stayed fast...

Scrap FX products used:
Hearts Divine Stencil
Petal Pattern Stencil
Chicken Wire Stamp

hope you've enjoyed these projects...

till next time
happy creating
xC

Wednesday, 11 November 2015

Phuket

Hi everyone, today I'd like to share with you another quick step by step  that I recently created for Couture Creations using the Nesting Hexagons die sets.... "Phuket"

this pic is another one with one of the cheeky tiger cubs at Tiger Kingdom in Phuket.... I loved that place so much...

now onto how I created this layout...
 I began by creating a water coloured background using the core'dinations heavy weight white cardstock...

 I then used the Nesting Hexagons die set and die cut my watercolored cardstock ...

then ink up the edges...

 I used a second sheet of the core'dinations heavy weight white cardstock as the base for my layout, and swiped some paint onto it....


 I played around with the hexagons until I was happy with the pattern... but it needed something more...

 so I added some gauze underneath the hexagons and then went to town with the sewing machine...

 a close up of the stitched detail...
finally it was a matter of putting it all together with some flowers a title and some bling...


one last close up.... 
notice the bling detail on the title... I hope you enjoyed this quick step by step... 

The products used in creating the layout;

Dies used:

Tools and Accessories used:

Adhesives used: 

Bulk White Flowers:

till next time
happy creating
xC


Thursday, 5 November 2015

Lovebirds and He(art)

Hi everyone, thanks for joining me here today...

Today I am sharing my latest work for Scrap FX ...
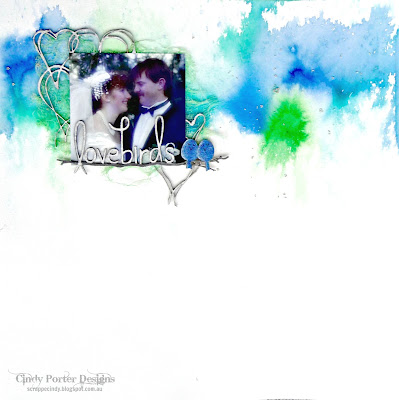
first up I have a simple layout that I created using some of the latest releases..."lovebirds"
I stumbled across another wedding pic from all those years ago... and I really do mean all those years ago, 27 to be exact, can someone please tell me where that time went!!! It still seems like only yesterday.....

I wanted to have a play with some of my acrylic inks and the new Prima watercolour paper, and this background is the result...

This is one of the new wordlets... isn't it cute.... I painted it up with some Inka Gold to give it that fabulous metallic sheen... you know the one that makes it almost impossible to photograph well... 

I used the new heartscrawl behind my photo, again painted up with the Inka Gold.... isn't it a fabulous chipboard piece.... I just love all the scribble type chippie pieces Scrap FX has now....

as I mentioned at the start this is a simple layout(especially for me).... to finish it off I coloured some gauze to place under the photo, and applied a very light sprinkling of microbeads to the layout...

Scrap FX products used:

Next up I'd like to share with you a journal/notebook cover I created...
 So I began with a hardcover book.... I removed all the pages so I just had the cover and then got to work on it... I firstly gave it a nice coat of orange Viva Croco.... I love the metallic crackle finish this product gives... (again a nightmare to photograph because of the gorgeous sheen)

I fell in love with the new He(art) phrase.... it comes in two pieces and I just love the words... they totally speak to me...

 and last but not least this gorgeous Halloween Heart.... how awesome is it!!! I am totally in love!!!

 One last shot of my cover ready for use...

Scrap FX products used:

hope you enjoyed these projects,
till next time,
happy creating